Create Files using GitHub’s online editor
Requirements
You will need to have created a GitHub account and forked the wiki to your account.
Introduction
GitHub’s online editor allows you to change and create files using nothing but your browser.
It may not be as versatile as using a local copy but you don’t need to worry about setting up git and all.
This guide will show you how to create a new wiki file using github’s online editor.
Your main reason for adding new pages is most likely to fill in missing information, but maybe you also want to add an example wiki entry for a given mod handler, whatever the reason, feel free to commit changes and eventually file a Pull Request.
However, remember that you need to create the English version, translations are then handled via CrowdIn (but only after the PR has been merged).
Where to create the file
Theoretically, it doesn’t matter where you put your file, but please try to fit the current scheme:
- All files need to be in the
docsfolder. - The File structure should match the navigation bar crumbs. Example: When using the navigation bar in the wiki,
ICraftingRecipecan be found inVanilla/Recipes/Crafting Table Recipes/ICraftingRecipe. The file for ICraftingRecipe can be found atdocs/Vanilla/Recipes/Crafting/ICraftingRecipe.md. As you can see, the paths don’t exactly match but they are sufficient to find the file. - All information for one mod should remain in one group/folder.
Create the file
After you have successfully located your future file’s path, navigate to the folder that will contain the file in GitHub, if it exists.
Don’t worry if it does not exist, you can still create the file.
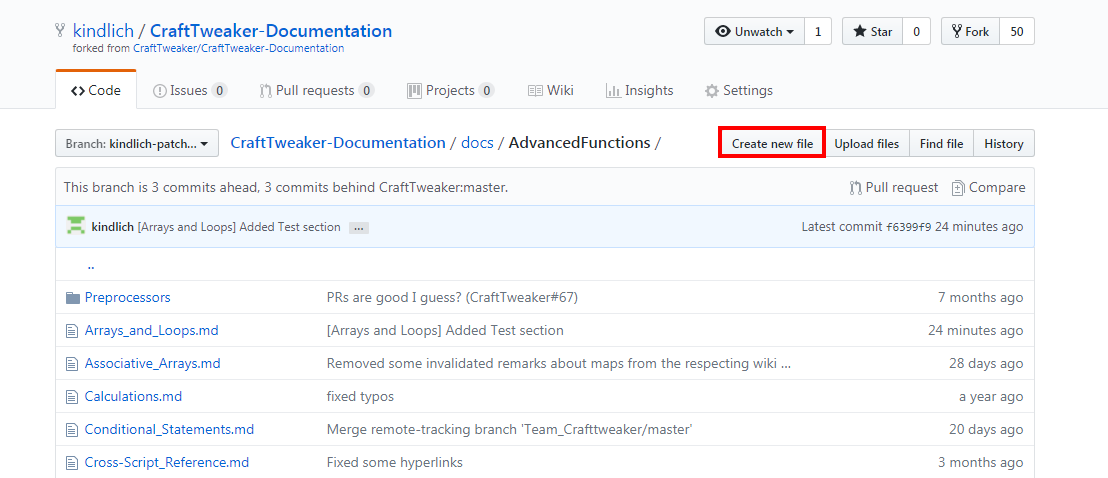
Say you want to create a file called Secret_Information.md in docs/AdvancedFunctions:
Find the path in GitHub and click Create new file
You are now presented with the new File editor page.
First, on the top you can see the path of the file that will be created. If we want the file to be created in exactly the directory that is shown in the path, we only need to provide a file title and extension. Remember, all wiki entry files should have the .md extension, since this wiki uses markdown.
If you want the file to be created in a (possibly nonexisting) subfolder, or even multiple folders down the path, you can use / to separate folder names (like you can already see in the given path).
The Editor allows you to create the file as you like, and also to directly view a preview of the compiled formatting.
If the syntax of the files is new for you, the wiki uses MarkDown. There should be many tutorials to find using google (or you could add one right here to this wiki if you like).
Add the file to the index
After you have created the file and commited the creation (see below) you will need to add the file to the index as well, so that it can be shown in the navigation bar later.
This index is the mkdocs.yml file.
This file contains everything that is needed to create the wiki, and you need to make sure not to break it (though we will tell you if your PR breaks a build should it come to that)!
All you need to do is add your file and categories to the pages list.
The format is pretty straight-forward:
- Entries start with a
- - Then comes the (shown, English) name for the group or entry, followed by a
: - If you are creating a grouping (e.g.
VanillaorMods) proceed on the next line, with two spaces inlined. - If you are creating an actual reference to a page file, add it on the same line, after the
:and a space. Make sure to wrap it in single quotes'to ensure that the build works as expected. The path is relative to thedocsfolder, sodocs/Vanilla/Commands.mdbecomesVanilla/Commands.md.
For examples check the current mkdocs.yml file on github. Alternatively, edit this file and add your own example here.
Save/Commit the changes
Note: This description originates from the edit files guide but the same principles apply, feel free to substitute with your own version if needed
After you have created the file content you need to let GitHub know that you want to save your changes.
That’s what the commit box below your editor is for:
You cannot simply save the file, you need to provide a summary of what you did (commit title) and optionally a short description where you can put additional information like why you did the changes or what exactly was changed.
By default it looks roughly like this:
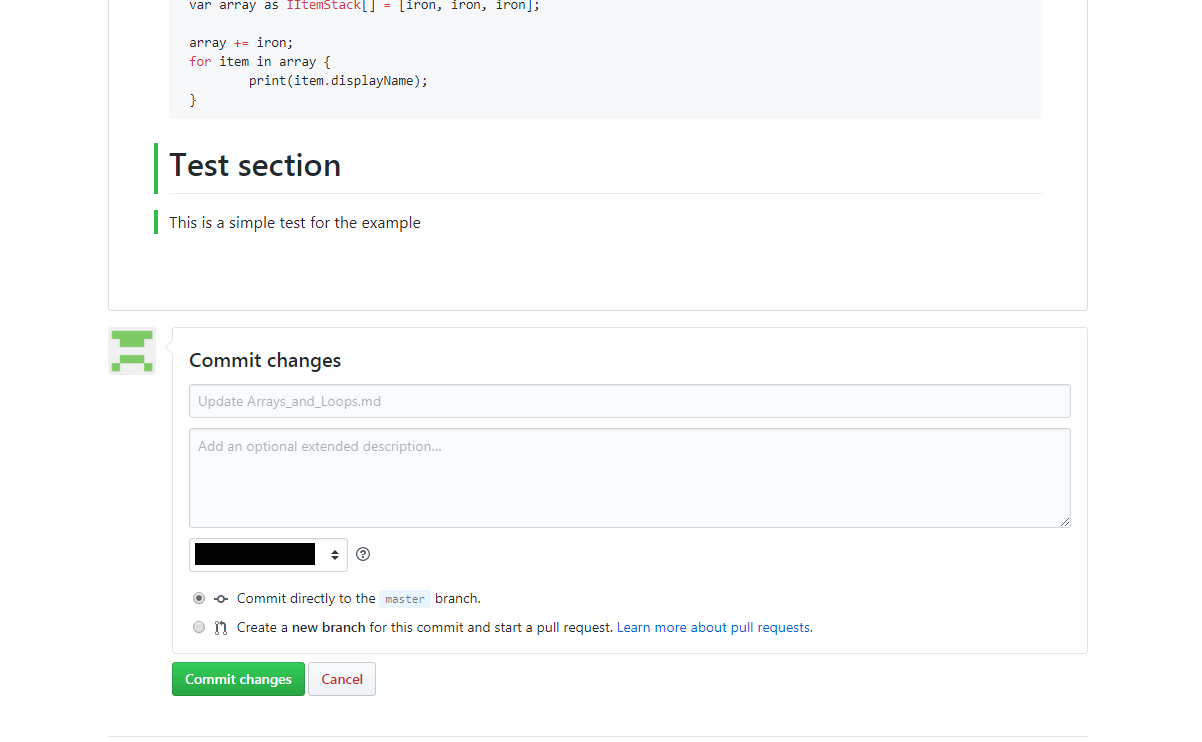
In this example, the Commit title (or edit summary) is Update Arrays_and_Loops.md. GitHub cannot know what your actual changes were supposed to do, so it tries something as generic as this.
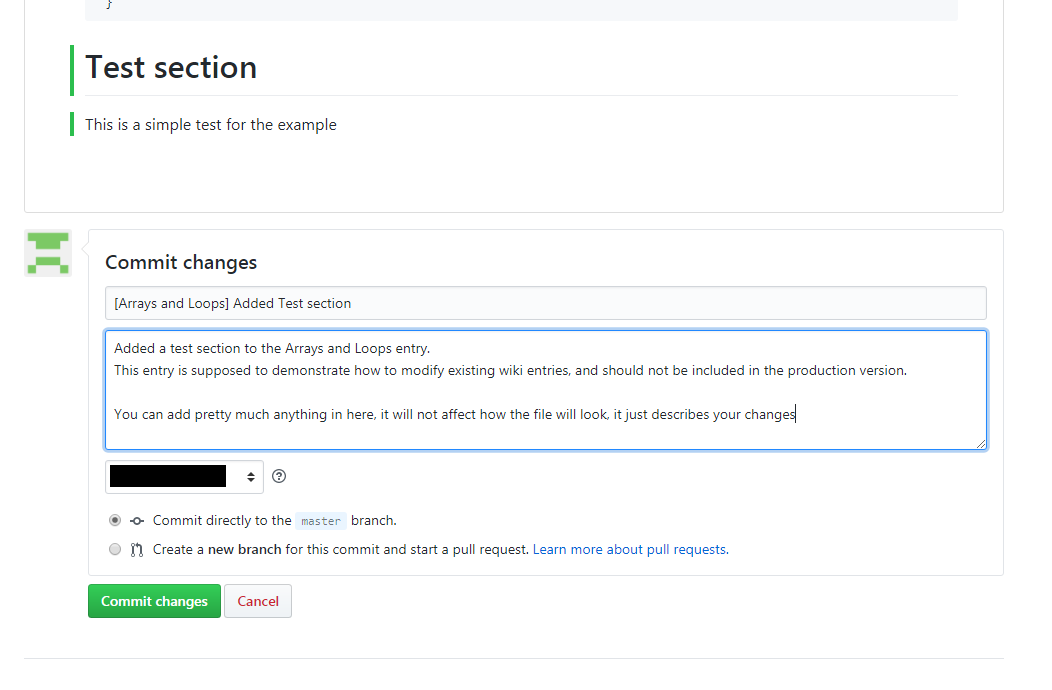
You might want to add an additional title or description, but it is not neccessary, though it makes reviewing your Pull request later on easier.
If you have multiple e-mail addresses registered for your GitHub account, you can choose as which one you will create the commit. This will not have any real impact for contributing, though.
You can also decide whether you want to commit directly to your master branch or rather create a new branch for your commit. In most cases committing to your master branch works just fine.
A filled out example might look like this:
What to do next
After you have committed your changes, you can go on and edit or create more files using the online editor.
After you have done all your changes, you can file a Pull Request.